Indulge Your Sweet Tooth: Easy Homemade Chocolate Truffles with Just Two Ingredients
Imagine a world where luxurious, melt-in-your-mouth chocolate truffles aren't a gourmet purchase but a delightful creation you whip up in your own kitchen with minimal effort. Sounds like a dream? Not anymore! We're here to reveal the secret to crafting exquisite homemade chocolate truffles using an incredibly simple method that requires only two primary ingredients. Forget complex techniques or intimidating culinary terms like "ganache" – this recipe is so straightforward, you'll find it easier than baking a batch of cookies, yet the results are nothing short of spectacular.
There's something truly special about a perfect chocolate truffle. That initial delicate coating, giving way to a rich, velvety center that dissolves on your tongue, leaving a concentrated burst of chocolate flavor. Traditionally, these decadent treats have been associated with high-end confectioneries or demanding French patisserie. However, thanks to a clever shortcut, anyone can achieve that same level of indulgence at home. Whether you're looking to impress guests, create a thoughtful gift, or simply satisfy a sudden craving for something truly sweet, these two-ingredient chocolate truffles are your ultimate solution.
The Magic Duo: Unveiling the Two Essential Ingredients
The beauty of this recipe lies in its elegant simplicity, relying on just two powerhouse ingredients to create a rich, creamy, and utterly irresistible truffle base. While the concept might seem almost too good to be true, the combination of these specific components yields a confection that rivals its more complex counterparts.
- Good-Quality Chocolate Chips (or Bars): Since chocolate is the star of the show here, its quality will significantly impact the final flavor of your truffles. While semi-sweet or dark chocolate chips are often recommended for a classic, intense flavor profile, feel free to experiment with milk chocolate if that's your preference. The key is to choose a brand you enjoy eating on its own, as its characteristics will shine through. Opt for baking chocolate or chips specifically designed for melting, as they tend to have a better consistency.
- Sweetened Condensed Milk: This isn't just any milk; it's a game-changer for homemade confections. Sweetened condensed milk is precisely what its name suggests: cow's milk from which water has been removed, and a significant amount of sugar has been added, then cooked down to a thick, syrupy consistency. Its high sugar content not only sweetens the truffles but also acts as a binder and emulsifier, contributing to their incredibly smooth, creamy, and stable texture. It's the secret weapon that eliminates the need for heavy cream or tempering, making these luxurious condensed milk truffles a breeze to prepare.
While technically optional, a dash of good-quality vanilla extract is highly recommended. Vanilla and chocolate are a match made in heaven, with vanilla acting as an unsung hero that brightens and enhances chocolate's inherent flavors, adding depth and balance. Just a teaspoon can transform your truffles from good to absolutely unforgettable.
Crafting Your Confections: A Simple Step-by-Step Guide
The process of transforming these two humble ingredients into glorious chocolate truffles is remarkably straightforward. You won't need any special equipment beyond a microwave-safe bowl and a spoon, making this an accessible project for even the most novice bakers.
Step 1: Melt and Marry Your Ingredients
Begin by combining your chosen chocolate chips and sweetened condensed milk in a microwave-safe bowl. Heat the mixture in the microwave at 70% power for one minute. Remove the bowl and stir the mixture thoroughly. The chocolate won't be fully melted yet, and that's perfectly fine. Continue heating in short 30-second intervals at full power, stirring well after each interval, until the chocolate is completely melted and smoothly blended with the condensed milk. You're aiming for a uniform, glossy, and thick mixture. The consistency should be like a rich, pourable ganache. For those who prefer not to use a microwave, a double boiler method works equally well: place the bowl over a saucepan of simmering water, ensuring the bottom of the bowl does not touch the water, and stir until melted and combined.
Step 2: Chill to Perfection
Once your chocolate mixture is perfectly smooth, cover the bowl tightly with a lid or plastic wrap. This prevents a skin from forming on the surface. Transfer the covered bowl to the refrigerator for at least two hours. The goal is for the chocolate ganache to firm up significantly, becoming pliable but not hard. Depending on your refrigerator's temperature and the type of chocolate used, this chilling time might extend to three or even four hours. It's crucial not to rush this step, as adequately chilled ganache is essential for easy handling and forming the truffles.
Step 3: Form Your Truffles
Before retrieving your chilled ganache, prepare your coatings. Sprinkle your desired coating (cocoa powder, crushed nuts, etc.) onto several individual plates or shallow bowls and set them aside. Remove the firm ganache from the refrigerator. Using a teaspoon or a small cookie scoop, scoop out small portions of the mixture. Roll each portion quickly between your palms to form a smooth ball. Working quickly helps prevent the warmth of your hands from melting the chocolate too much. If the mixture becomes too sticky, pop it back into the fridge for 10-15 minutes. For an extra touch of neatness and to minimize mess, you can wear food-grade gloves while rolling.
Step 4: Coat and Adorn
Immediately after rolling each truffle, gently place it into one of your prepared coating plates. Roll the truffle around until it's evenly coated on all sides. Transfer the finished truffles to a parchment-lined baking sheet or airtight container. Repeat this process with the remaining ganache until all your delicious no-stress chocolate truffles are formed and coated.
Elevate and Personalize: Beyond the Basic Truffle
While the two-ingredient base is divine on its own, one of the most exciting aspects of making homemade chocolate truffles is the endless possibility for customization. This is where you can truly let your creativity shine and tailor the treats to your specific tastes or the occasion.
Delectable Coating Ideas:
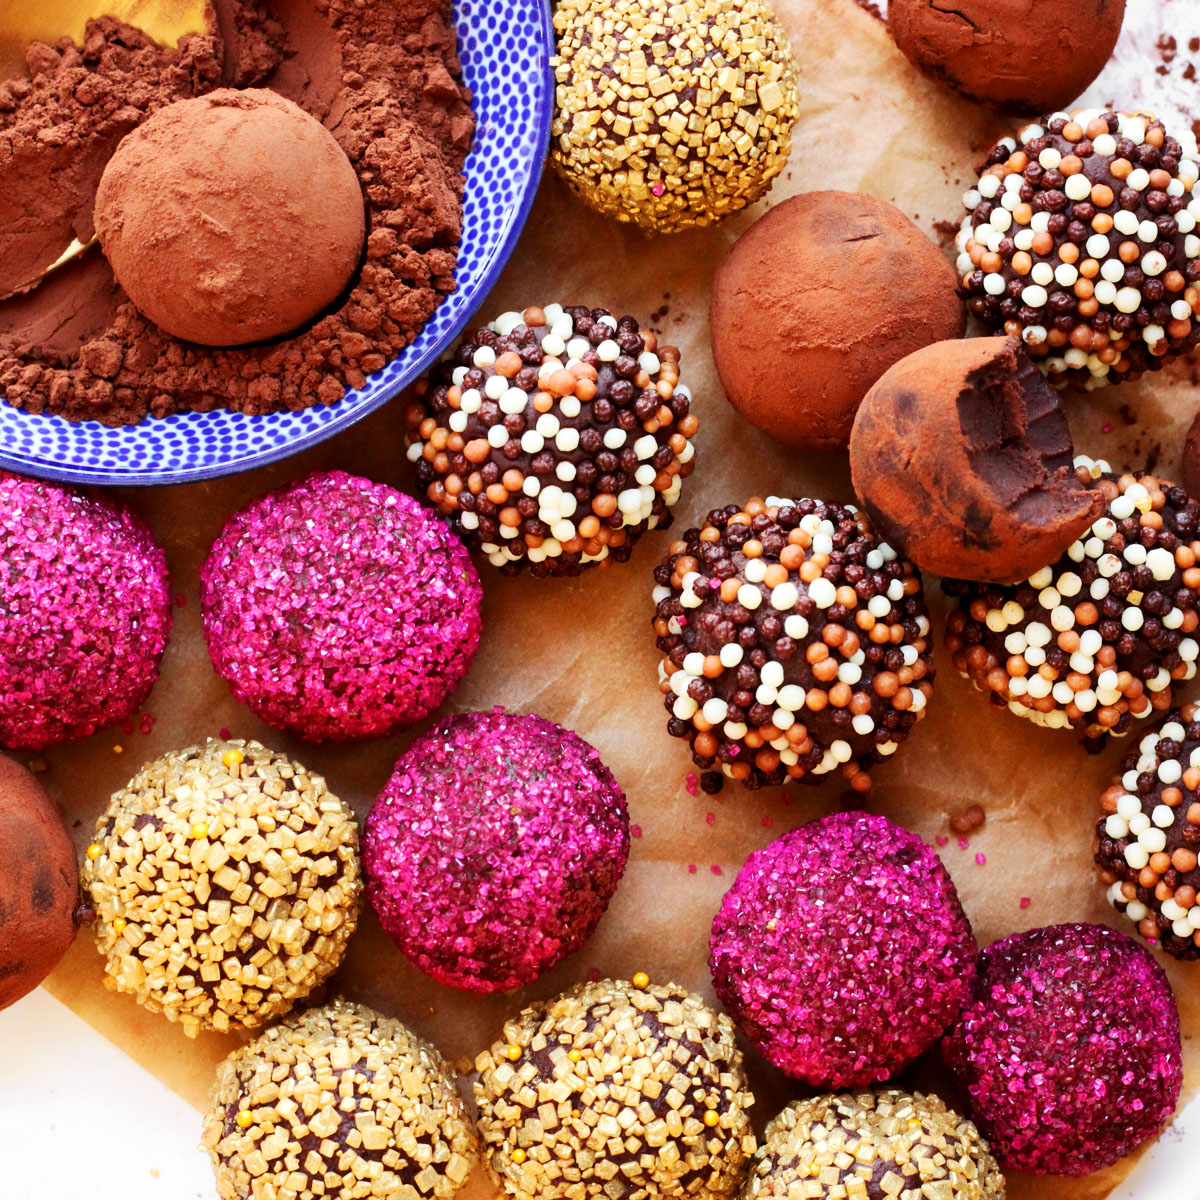
- Classic Cocoa Powder: A dusting of high-quality Dutch-processed cocoa powder creates that iconic, slightly bitter contrast against the sweet interior. For a deeper flavor, try espresso powder.
- Chopped Nuts: Finely crushed pecans, walnuts, almonds, or pistachios add a delightful crunch and nutty flavor. Toasting the nuts beforehand enhances their aroma.
- Chocolate Sprinkles or Cacao Nibs: For a playful look, chocolate sprinkles are always a hit. Cacao nibs offer an intense, slightly bitter chocolatey crunch.
- Shredded Coconut: Toasted or untoasted, coconut flakes add a tropical twist.
- Powdered Sugar: A simple, elegant coating for a softer sweetness.
- Melted Chocolate Drizzle: Dip the truffles in tempered chocolate for an extra layer of decadence, or simply drizzle with contrasting chocolate.
- Spices: A hint of cinnamon, cayenne pepper (for a Mexican hot chocolate vibe), or even a touch of flaky sea salt can add an unexpected dimension.
Flavor Infusions for the Ganache:
Before chilling, consider stirring in a few extra ingredients to infuse your truffle base with unique flavors:
- Liqueurs: A tablespoon of rum, Kahlua, Grand Marnier, or Irish cream can add an adult twist.
- Extracts: Beyond vanilla, try almond, peppermint, orange, or even a few drops of high-quality coffee extract.
- Zests: Finely grated orange or lemon zest brightens the chocolate flavor beautifully.
- Spices: A pinch of ground cinnamon, cardamom, or a tiny dash of chili powder stirred into the melted mixture before chilling.
Tips for Success and Storage
Making chocolate truffles is incredibly forgiving, but a few expert tips can ensure your batch is absolutely perfect every time:
- Quality Matters: Reiterate that using good-quality chocolate makes a discernible difference in taste.
- Don't Overheat: When melting the chocolate, heat in short bursts and stir frequently. Overheated chocolate can seize or become grainy.
- Patience with Chilling: The chilling step is non-negotiable. If the ganache isn't firm enough, it will be sticky and messy to roll. If you're short on time, you can place it in the freezer for about 30-45 minutes, but keep a close eye on it.
- Work Clean and Quickly: Keep your hands as cool as possible while rolling. If the ganache starts to melt, put it back in the fridge for a few minutes.
- Uniform Size: For a professional look, try to make your truffles roughly the same size. A small cookie scoop or melon baller can help with this.
- Storage: Homemade chocolate truffles should be stored in an airtight container in the refrigerator. They will last for up to 2-3 weeks, though they rarely survive that long! Bring them to room temperature for about 10-15 minutes before serving for the best texture and flavor. They can also be frozen for up to 3 months; just thaw them in the refrigerator overnight.
Conclusion: Your Passport to Homemade Decadence
Who knew that such a simple combination of ingredients could unlock a world of gourmet indulgence? These easy homemade chocolate truffles prove that you don't need a professional pastry chef's skills or a pantry full of exotic ingredients to create something truly magnificent. With just chocolate and sweetened condensed milk, you can whip up a batch of velvety, rich, and utterly irresistible treats that are perfect for gifting, entertaining, or simply savoring yourself. So go ahead, gather your two ingredients, and prepare to be amazed by the magic of homemade chocolate truffles!
