No-Stress Chocolate Truffles: Easier Than Baking Cookies
Imagine the scene: a beautifully arranged platter of decadent chocolate truffles, shimmering with cocoa dust or studded with crushed nuts, gracing your dessert table. Your guests rave about their rich, melt-in-your-mouth texture and intense chocolate flavor. Secretly, you chuckle, knowing that these luxurious bites were arguably simpler to create than your last batch of cookies. Yes, we’re here to debunk the myth that homemade chocolate truffles are a complicated, gourmet endeavor. Prepare to discover the delightful ease of making "ganache" – a word that often intimidates, but in this context, translates to pure, unadulterated simplicity.
For too long, the idea of crafting homemade chocolates has been relegated to professional chocolatiers or ambitious bakers. However, with a game-changing secret ingredient, you can whip up batches of exquisite
Easy Homemade Chocolate Truffles with Just Two Ingredients that will impress without the stress. Forget the precise measurements, oven temperature anxieties, and the countless steps associated with traditional baking. These easy chocolate truffles rely on a foolproof method and minimal ingredients, proving that true indulgence doesn't have to come with a hefty time commitment or a complicated recipe.
The Secret to Effortless Elegance: Condensed Milk Truffles
The magic behind these incredibly simple chocolate truffles lies in one humble yet powerful ingredient: sweetened condensed milk. This thick, sweet, and creamy dairy product transforms chocolate into a velvety smooth ganache base with remarkable ease. Unlike traditional ganache, which typically relies on heavy cream and precise temperature control, condensed milk provides a stable, rich, and naturally sweet foundation that practically guarantees success.
Why are these chocolate truffles easier than baking cookies? Consider the typical cookie recipe: flour, sugar, butter, eggs, leavening agents – all needing exact measurements and specific mixing techniques. Then there's the critical baking time and temperature, where a few minutes too long can lead to dry, crumbly cookies, and too short can leave them doughy. With condensed milk truffles, you largely sidestep these complexities. There’s no flour, no leavening, and best of all, no oven required! The process is primarily melting, chilling, and shaping – making it a truly no-stress chocolate experience perfect for beginners and seasoned bakers alike. You’re essentially creating a stable, luxurious chocolate fudge that you can roll into elegant spheres.
Crafting Your Perfect Truffle: Essential Ingredients & Savvy Choices
While the recipe boasts simplicity, the quality of your ingredients will profoundly impact the final taste and texture of your homemade chocolate truffles. Investing in good-quality components elevates these simple treats from good to truly gourmet.
The Star: Choosing Your Chocolate
The main keyword, "chocolate truffles," emphasizes that chocolate is the heart of this recipe. So, choose wisely.
- Semisweet or Dark Chocolate: These are excellent choices for a rich, intense chocolate flavor that isn't overly sweet, especially when balanced by the condensed milk. A good quality dark chocolate (60-70% cacao) will yield sophisticated truffles with complex notes.
- Milk Chocolate: If you prefer a sweeter, creamier truffle, milk chocolate is a perfectly valid option. Be aware that it may result in a slightly softer ganache, so ensure ample chilling time.
- White Chocolate: For a different profile, white chocolate can also be used, though it's technically not chocolate as it contains no cocoa solids. It offers a rich, buttery sweetness that pairs beautifully with various flavorings.
- Quality Matters: Regardless of your chosen type, opt for *good-quality chocolate chips or finely chopped baking bars*. Superior chocolate melts more smoothly, has a better flavor profile, and results in a silkier ganache. Avoid very cheap chocolate as it can contain more fillers, leading to a grainy texture.
The Sweet Binder: Sweetened Condensed Milk Unveiled
Sweetened condensed milk is precisely what its name implies: cow's milk from which water has been removed (condensed) and a substantial amount of sugar has been added. This results in a thick, syrupy, and incredibly sweet product. In our chocolate truffles, it acts as:
- A Sweetener: Providing the primary sweetness for the truffles.
- A Binder: Its thick consistency helps bind the melted chocolate, creating a firm yet pliable ganache.
- A Creaminess Enhancer: It imparts a wonderfully smooth, velvety texture that is characteristic of high-quality truffles.
While the recipe centers on using condensed milk, in a pinch, you *can* make your own from regular milk and sugar, or explore substitutes in other truffle recipes, but for this specific "no-stress" method, a can of store-bought sweetened condensed milk is your best friend.
The Flavor Amplifier: The Magic of Vanilla (and Beyond)
Vanilla extract, often considered a humble supporting player, is actually an unsung hero in chocolate recipes. It doesn’t just add its own flavor; it *enhances* and *brightens* the chocolate, balancing its natural bitterness and deepening its complexity. Think of it as the perfect counterpoint that allows the chocolate to truly shine. For this reason, always choose a good-quality pure vanilla extract – it truly makes a difference.
Beyond vanilla, feel free to experiment with other flavorings:
- Coffee: A teaspoon of espresso powder or strong brewed coffee can intensify the chocolate flavor beautifully.
- Liqueurs: A splash of rum, Kahlua, Grand Marnier, or even peppermint schnapps can transform these into sophisticated adult treats.
- Citrus Zest: Orange or lemon zest adds a refreshing, bright note.
- Spices: A pinch of cinnamon, chili powder, or cardamom can add warmth and an unexpected twist.
Dressing for Success: Creative Coatings
The outer coating not only adds visual appeal but also introduces another layer of flavor and texture to your homemade chocolate truffles. Get creative!
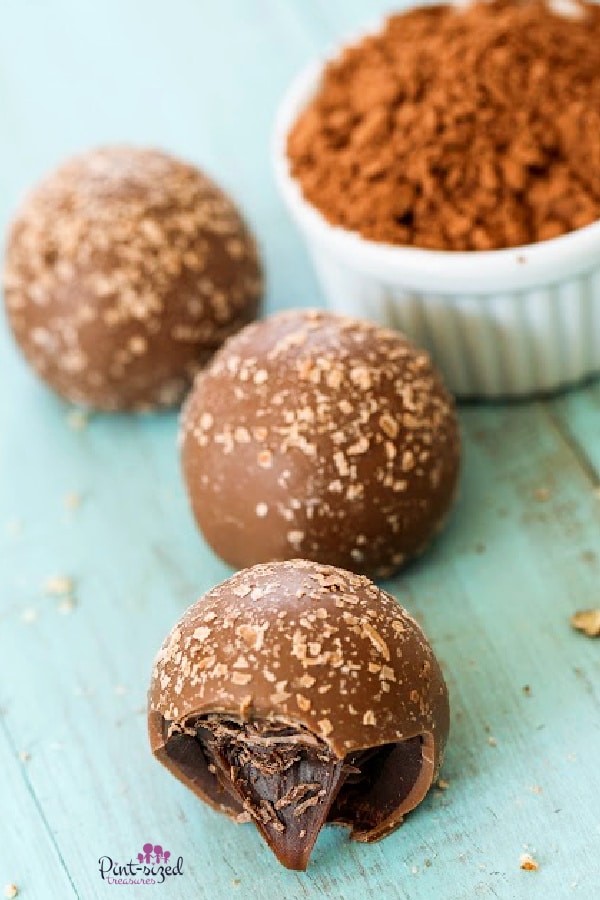
- Dutch Cocoa Powder: The classic choice, offering a slightly bitter contrast to the sweet interior.
- Espresso Powder: Adds a subtle coffee kick that pairs wonderfully with chocolate.
- Crushed Nuts: Pecans, walnuts, almonds, or pistachios offer a satisfying crunch. Lightly toast them for enhanced flavor.
- Cacao Nibs: Provide an intense chocolatey crunch and a slightly bitter, earthy note.
- Chocolate Sprinkles: A fun, festive, and kid-friendly option.
- Powdered Sugar: For a simple, elegant dusting.
- Shredded Coconut: Toasted or untoasted, it adds a tropical flair.
- Melted Chocolate: For a double-chocolate experience, dip chilled truffles into tempered chocolate.
From Melting Pot to Masterpiece: A Step-by-Step Guide
Making these easy chocolate truffles is a straightforward process that yields impressive results.
Step 1: The Silky Smooth Ganache Foundation
Combine your chosen chocolate chips (or finely chopped chocolate) and sweetened condensed milk in a microwave-safe bowl. The key here is gentle, even heating to prevent the chocolate from seizing.
- Microwave Method: Heat on 70% power for one minute, then remove and stir thoroughly. Continue heating in 30-second intervals, stirring vigorously after each, until the chocolate is completely melted and smoothly blended with the condensed milk. The mixture should be glossy and uniform. Add your vanilla extract (and any other liquid flavorings) at this stage and stir well.
- Double Boiler Method (Alternative): If you prefer not to use a microwave, place your bowl over a saucepan of simmering water (ensuring the bottom of the bowl does not touch the water). Stir constantly until the chocolate is melted and fully incorporated. This method offers more control over the heating process, reducing the risk of overheating.
Once your ganache is perfectly smooth, cover the bowl tightly with a lid or plastic wrap and refrigerate for at least two hours, or until the mixture is firm enough to scoop and roll, but still pliable. This chilling step is crucial for achieving the correct truffle consistency. If it's too soft, your truffles will be messy; too hard, and they'll be difficult to shape.
Step 2: Shaping and Rolling Your Indulgences
Once the ganache is firm, it's time for the fun part! Prepare your chosen coatings on separate plates or shallow bowls.
- Scoop: Using a teaspoon, a small cookie scoop, or even a melon baller, scoop out portions of the chilled ganache. For uniform truffles, try to make each scoop roughly the same size.
- Roll: Gently roll each portion between your palms to form a smooth ball. If the mixture is sticky, lightly grease your hands with a tiny bit of neutral oil or dust them with cocoa powder. Wearing food-safe gloves can also make this process cleaner and easier. Work quickly, as the heat from your hands can soften the ganache.
Step 3: The Grand Finale: Coating Your Truffles
Once rolled, immediately transfer each truffle to a plate with your desired coating.
- Coat: Roll the truffle around in the coating until it's evenly covered. You can use a fork to lift and turn the truffles to ensure full coverage without getting your hands too messy with the coating.
- Arrange: Place the finished truffles on a parchment-lined tray or plate. If you're planning to give them as gifts, consider arranging them in small cupcake liners or specialty truffle papers for a professional touch.
Elevate Any Event: Luxurious Condensed Milk Truffles with these personalized coatings!
Tips for Truffle Triumph and Gifting Perfection
To ensure your chocolate truffles are always a hit, keep these tips in mind:
- Troubleshooting Soft Ganache: If your ganache is too soft after the initial chilling, pop it back in the refrigerator for another 30-60 minutes. If it's still too soft, it might mean the chocolate-to-condensed-milk ratio was slightly off; you can try adding a few more melted chocolate chips and re-chilling.
- Troubleshooting Hard Ganache: If your ganache is too firm to scoop, let it sit at room temperature for 10-15 minutes until it softens slightly. You can also gently knead a small portion with your hands to make it more pliable.
- Storage: Store homemade chocolate truffles in an airtight container in the refrigerator for up to 2-3 weeks. Let them come to room temperature for about 15-20 minutes before serving for the best texture and flavor. They can also be frozen for up to 3 months; thaw in the refrigerator.
- Gifting: Truffles make exquisite homemade gifts. Arrange them in small decorative boxes, tie with a ribbon, and add a custom tag. They're perfect for holidays, birthdays, or just as a thoughtful "thank you." Consider making an assortment of different coatings and flavors for a truly impressive presentation.
- Batch Variations: Don't be afraid to divide your ganache after melting and add different flavorings or coatings to each portion. This allows you to create a diverse array of truffles from a single batch.
Conclusion
Gone are the days when sophisticated chocolate truffles were reserved for high-end patisseries or intimidating recipes. With just a few simple ingredients and a straightforward method, you can create a truly indulgent treat that rivals any store-bought equivalent. These no-stress chocolate truffles, made effortlessly with sweetened condensed milk, are genuinely easier to master than many cookie recipes, offering a delightful foray into the world of homemade confectionery. So go ahead, embrace the ease, unleash your inner chocolatier, and prepare to delight yourself and everyone around you with these velvety, rich, and utterly irresistible bites of pure chocolate bliss.